Data is quite the buzz word in education when shaping learning for both students and teachers. I’ve been elbow deep in data recently and realized the importance of backward designing my Google Forms to generate a clean Sheet that I can manipulate easily. I want to share some of the tips and tricks I’ve learned to help others avoid an overwhelming amount of data. The tea is hot and ready. Let’s go!

Begin with the End in Mind
The scenario: You’ve just closed your big event registration or feedback survey. You eagerly click “View in Sheets” and your heart sinks. The data is a chaotic mess: some people only entered their first name, some entered nicknames, when you needed numbers some people typed out the “one” or “two” and so on, there are blanks when you needed responses regarding food restrictions, etc. You contemplate the amount of time you’ll spend simply cleaning the data and following up looking for missing information so you can analyze it and feel defeated before you even begin.
The problem isn’t the data; it’s the design. The key to a beautiful, usable spreadsheet is to design your Form backward. Start by imagining your ideal spreadsheet, and then build the Form to produce it.
Before you drag and drop a single question, ask yourself these questions about your final spreadsheet:
- What columns do I need? Literally, sketch it out or type the headers in a blank Sheet.
- How will I need to sort this data? Will you need to sort by last name? By submission date? By department? This will inform how you separate your questions.
- How will I need to filter this data? Do you need to see everyone who chose “Workshop A”? Or everyone who needs a “Large” T-shirt? This dictates using standardized answers.
- What calculations or charts will I create? Do you need to count the number of RSVPs? Or create a pie chart of meal choices? This requires clean, consistent data.
The answer to these questions becomes the blueprint for your Form. Every clean column you envisioned is a well-designed question.
Tips for a Clean Spreadsheet
The following tips come from years of learning how I like to sort and categorize information. Additionally, when I am working with data from a Form created by another person, these are the things that can frustrate me when working within the Sheet. In the end, you will figure out how you want your data to look. That is great!
Tip 1: Topic as Column Header Not the Whole Question
- Problem: You write a detailed question like, “Is this a certified teacher with previous experience in another district?” In Google Sheets, this becomes a column header that needs to be resized or mushed to make it easier to read. While one or two questions like this might be fine, a whole bunch can make the column headers look full and busy and overwhelming.
- Tip: Use the “Question” field for a short, clean column header you want to see. Use the optional “Description” field (click on the three dots in the lower right corner of the question box to find) for instructions, context, and examples.
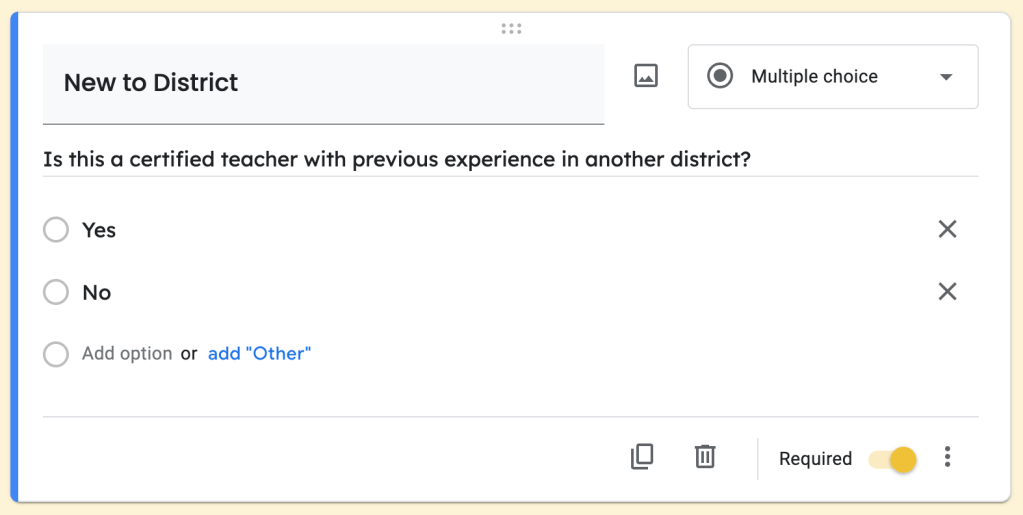
Now the only thing in the column header is “New to District” which is all I really need to know what the response means. Another way I’ve used the description is to clarify how a response should be given:
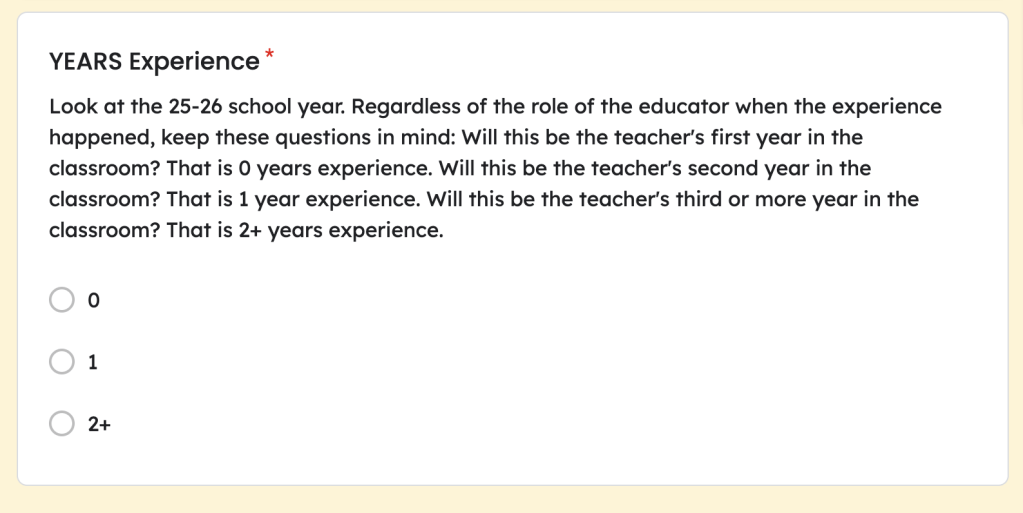
If I had added the clarification in the “Question” field, it would look absolutely ridiculous in the Sheet as a column header.
Tip 2: Know How You will Want to Organize Data
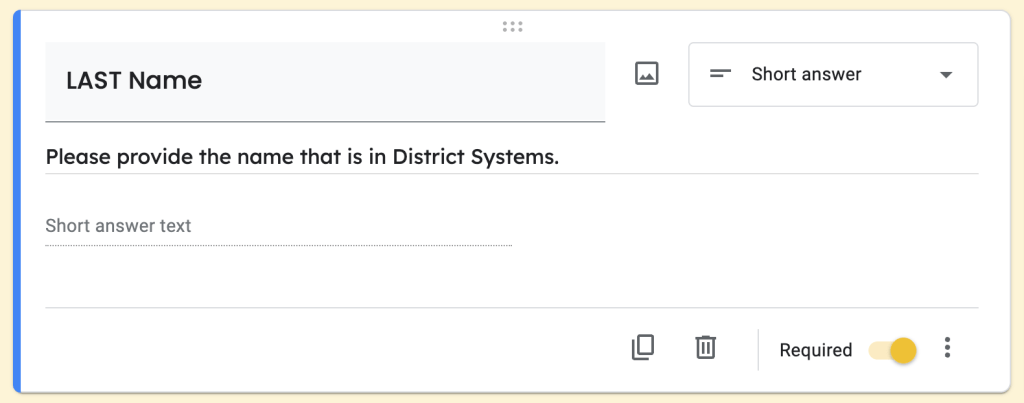
- Problem: Asking for “Full Name” in one field. I like to sort responses by last name. Perhaps it is the ELAR teacher in me. However, if I make the question “Name” or “Full Name,” I can’t sort by last name. Even if I use the “Description” field to clarify “Last, First;” not everyone will remember to enter it in that way.
- Tip: If you need to sort or filter by a piece of information, give it its own question. Break down complex information into its smallest useful parts. BONUS TIP: if you know some people have names that don’t match official records, you can clarify in the “Description” field what version of their name you require.
- Example:
- Question 1:
LAST Name(Short answer) - Question 2:
FIRST Name(Short answer)
- Question 1:
Tip 3: Consistency is Key
- Problem: You ask “What grade level do you teach?” with a short-answer question. You might end up with “Kinder,” “K,” “Kindergarten,” and “Kindergarden” (a typo). You can’t easily filter or count this data.
- Tip: Never use a “Short answer” question when you can provide predefined options. Use “Multiple choice,” “Checkboxes,” or “Dropdown” to force users into selecting a clean, consistent answer. Personally, “Dropdown” is my favorite when there are a lot of choices. For example, we have over 30 campuses in my district. If I used “Multiple Choice,” that would make the question take up a lot of space on the Form.
- Example:
- Question:
Content Area(Dropdown) - Options:
RLA,Math,Science,Social Studies,etc.
- Question:
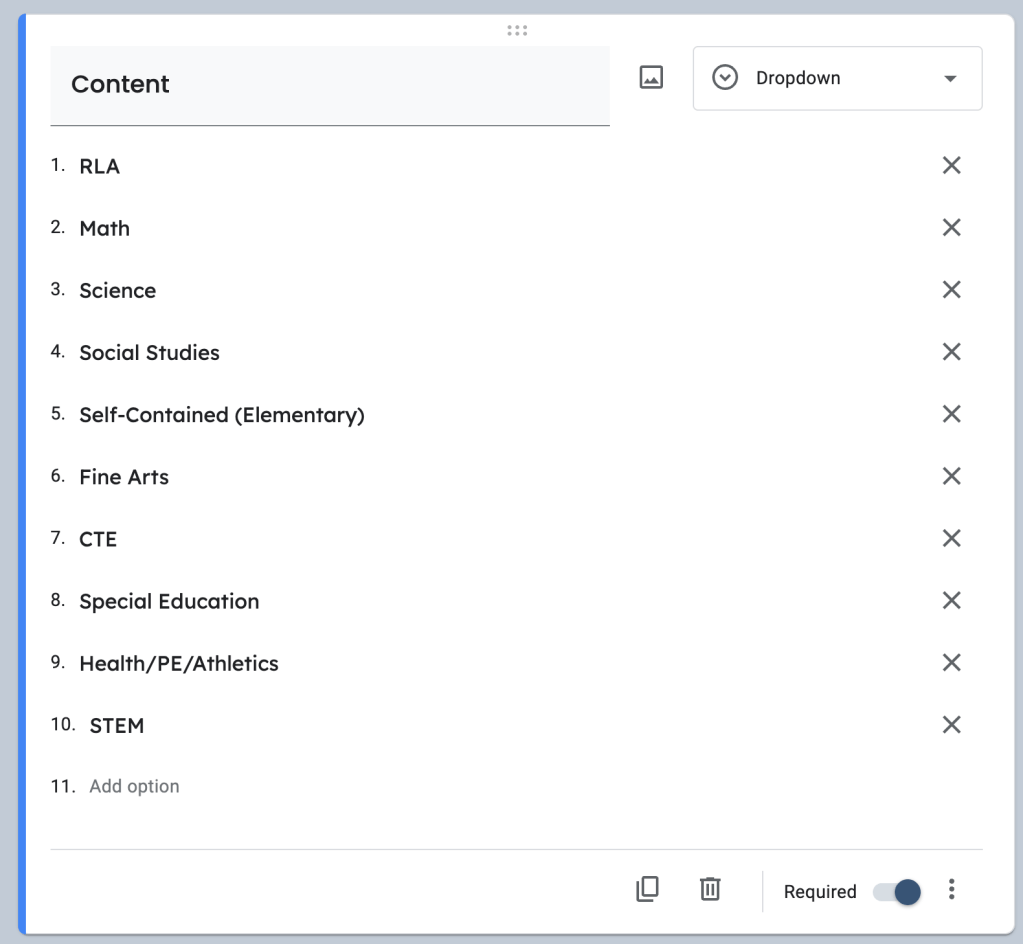
It will take up a lot of space on the design side of the Form, but the Published Form will be clean.
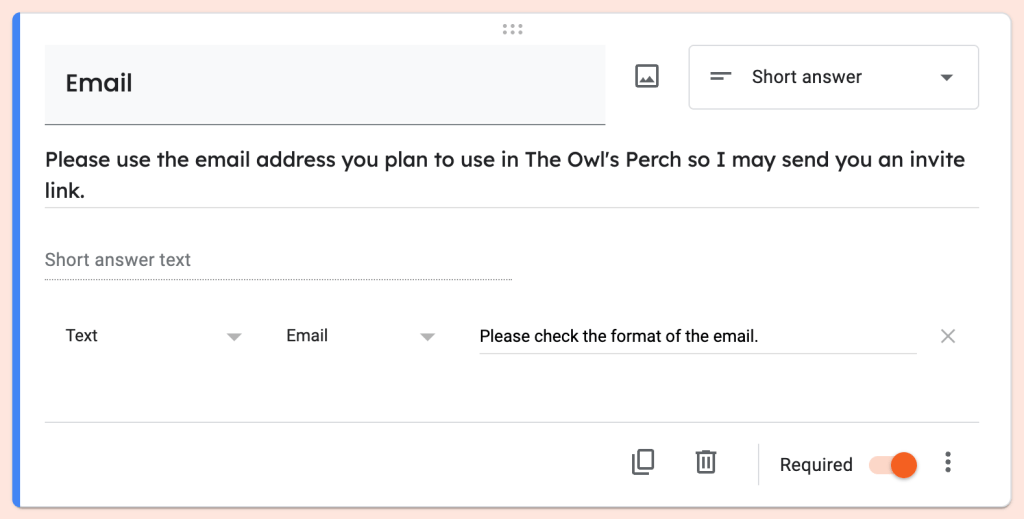
Tip 4: Use Response Validation to Error-Proof Your Form
- Problem: You ask for an email address and someone forgets the “.com”. You ask for a phone number and get “N/A.” You ask for a quantity and someone types “five.”
- Tip: Use the built-in Response Validation (click the three dots on a question). You can require that an answer is a number, is in a valid email format, or contains specific text.
- Example:
- Question:
Email Address(Short answer)- Response Validation:
- Select
Text - Select
Email address - Custom error text:
Please enter a valid email address.
- Select
- Response Validation:
- Question:
A Small Investment, A Huge Payoff
A few extra minutes of planning before you build your Google Form will save you hours of frustrating data cleanup later. By thinking like a spreadsheet first, you’re not just creating a form; you’re building a perfect dataset from the ground up. What’s your best Google Forms tip? I would love for you to share them in the comments below.

Leave a comment